")
For most homeowners, a roof replacement is one of the largest home improvement investments they will ever make. Yet the process itself — what actually happens on your property, in what order, and why — remains opaque for many people until the crew arrives and work begins.
This guide provides a clear, step-by-step walkthrough of the roof replacement process as it is executed by a professional roofing contractor in Arizona. Understanding what to expect at each stage helps you ask better questions, evaluate your contractor’s performance, and feel confident that the work is being done correctly.
Stage 1: Professional Roof Inspection and Estimate
Every roof replacement begins with a thorough inspection. A qualified contractor will access your roof to assess the current condition of the roofing material, underlayment, decking, flashing, gutters, and any penetrations such as vents, pipes, or skylights.
The inspection serves two purposes. First, it establishes the true scope of what needs to be done — including any issues that go beyond the surface material, such as damaged decking that will need replacement. Second, it gives the contractor the information needed to provide an accurate, written estimate.
A professional inspection at this stage prevents unpleasant surprises during the job. A contractor who quotes without a thorough inspection is likely to provide a low initial number that escalates once the roof is stripped. Always insist on a written, itemized estimate based on a documented inspection before signing a contract.
Stage 2: Material Selection and Contract Signing
Once the inspection is complete and you have received a detailed estimate, the next step is selecting your roofing material and finalizing the contract. Your contractor should walk you through the available options for your home’s structure and neighborhood — including material type, manufacturer, color, and warranty terms.
In Arizona, the most common choices for residential replacement are concrete tile, clay tile, asphalt shingles, and metal roofing. Your contractor should explain the performance trade-offs between these options in the context of your specific home and your priorities — cost, longevity, energy efficiency, HOA compliance, or a combination.
The contract should clearly specify the material being installed, the brand and product line, the scope of work including tear-off and disposal, the underlayment system, the warranty terms, the timeline, the payment schedule, and the contractor’s license number and insurance information. Do not sign a contract that lacks any of these elements.
Stage 3: HOA Approval (If Applicable)
If your property is governed by a homeowners association, many HOAs require approval of roofing materials and colors before installation begins. Your contractor should be familiar with this requirement and assist you in submitting the appropriate documentation.
Proceeding with installation before HOA approval is obtained can result in the association requiring removal of non-approved materials at your expense. This step should be completed before scheduling the installation date.
Stage 4: Material Delivery and Site Preparation
One to two days before the scheduled installation date, your roofing materials will be delivered to your property. For tile roofing, this means pallets of tile — often several thousand pounds — will be placed in your driveway or on your property. For shingles or metal, the delivery is significantly lighter and more compact.
Your contractor will also prepare the site: placing protective tarps or boards over sensitive landscaping, hardscaping, and exterior HVAC equipment. Roofing generates considerable debris — tile fragments, old underlayment, fasteners, and dust — and a professional contractor takes steps to protect the surrounding property from damage before work begins.
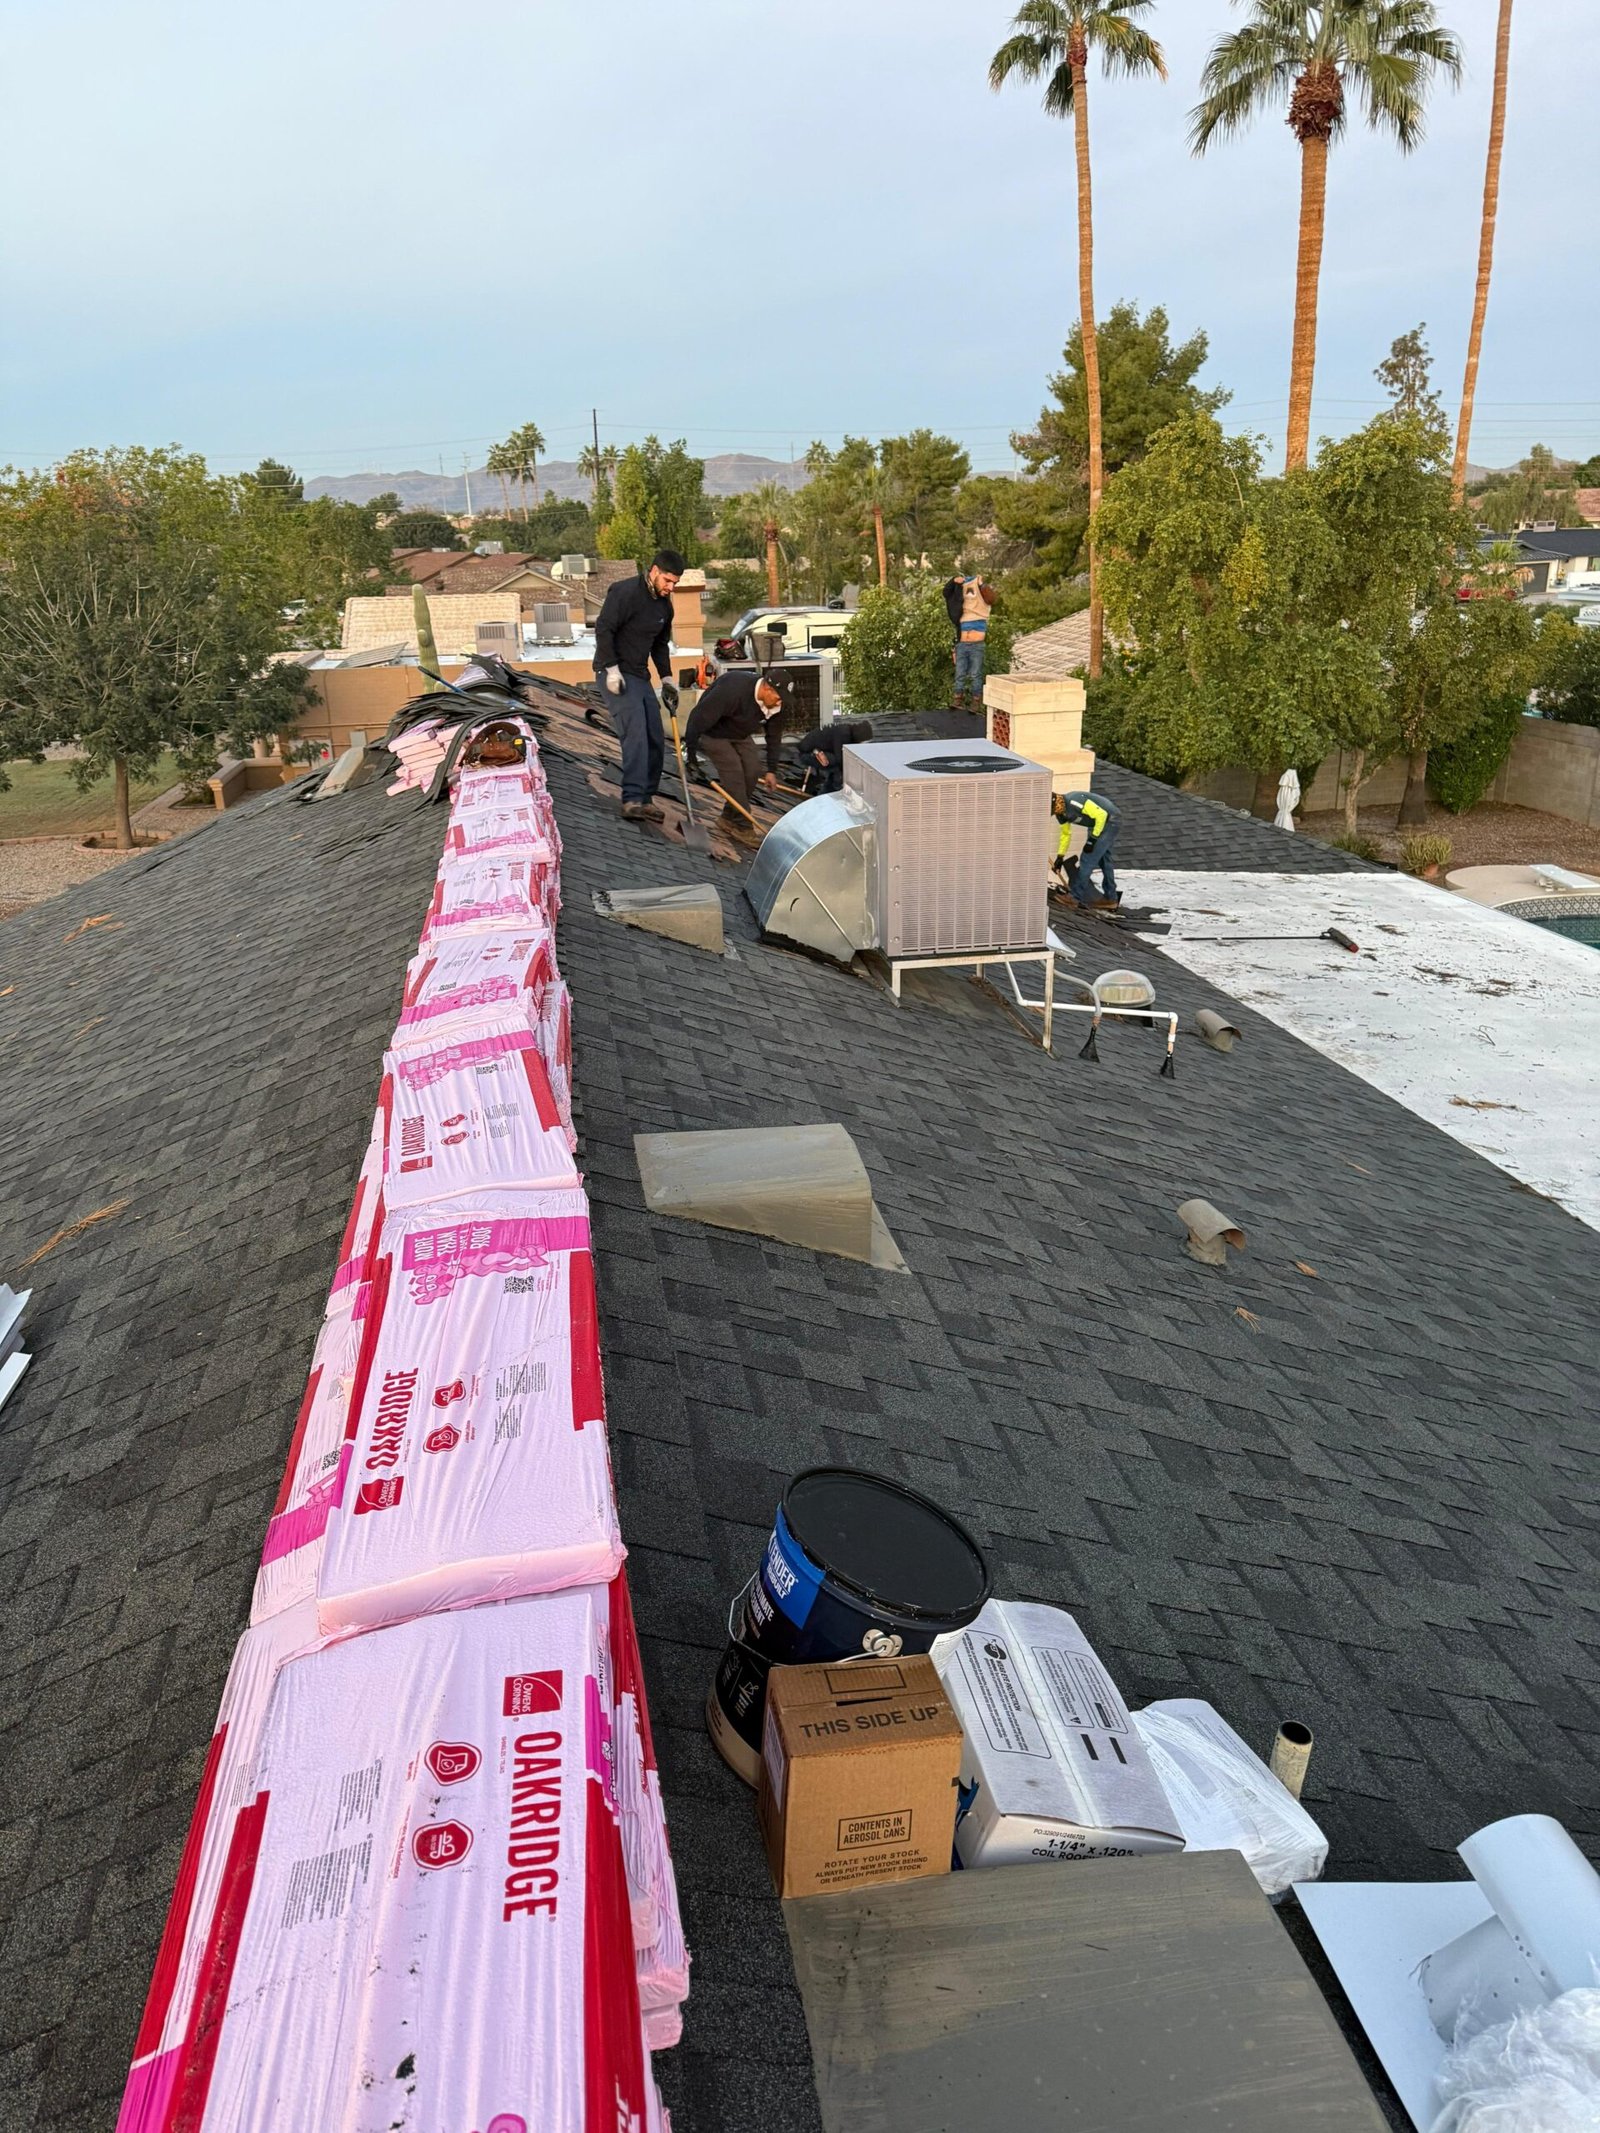
Stage 5: Tear-Off of the Existing Roof
On the first day of active installation, the crew begins by removing the existing roofing material. This is called tear-off. In Arizona, complete tear-off is standard practice and in most cases required by local building codes. It is not simply a cost-add — it is necessary because it allows the contractor to inspect and repair the underlying deck before installing the new system.
Tear-off is the loudest and most disruptive part of the process. Tiles, shingles, and underlayment are stripped from the roof and loaded into a dumpster or haul-away trailer. Expect noise throughout the day. Most homeowners and their families remain comfortable inside the home, but anticipate disruption.
Stage 6: Deck Inspection and Repair
With the roof stripped to bare decking, the contractor performs a thorough inspection of the structural deck — typically plywood or OSB sheathing. Any sections that are rotted, damaged by moisture, or structurally compromised are identified and flagged for replacement.
This is the stage where costs can vary from the original estimate. A reputable contractor will document any discovered damage with photographs and provide a transparent explanation of what needs to be replaced and why before proceeding. The cost of deck repairs is generally modest — replacement of a few damaged boards typically runs $300 to $800 — but it is an essential step. Installing a new roof over damaged decking creates structural vulnerabilities and voids manufacturer warranties.
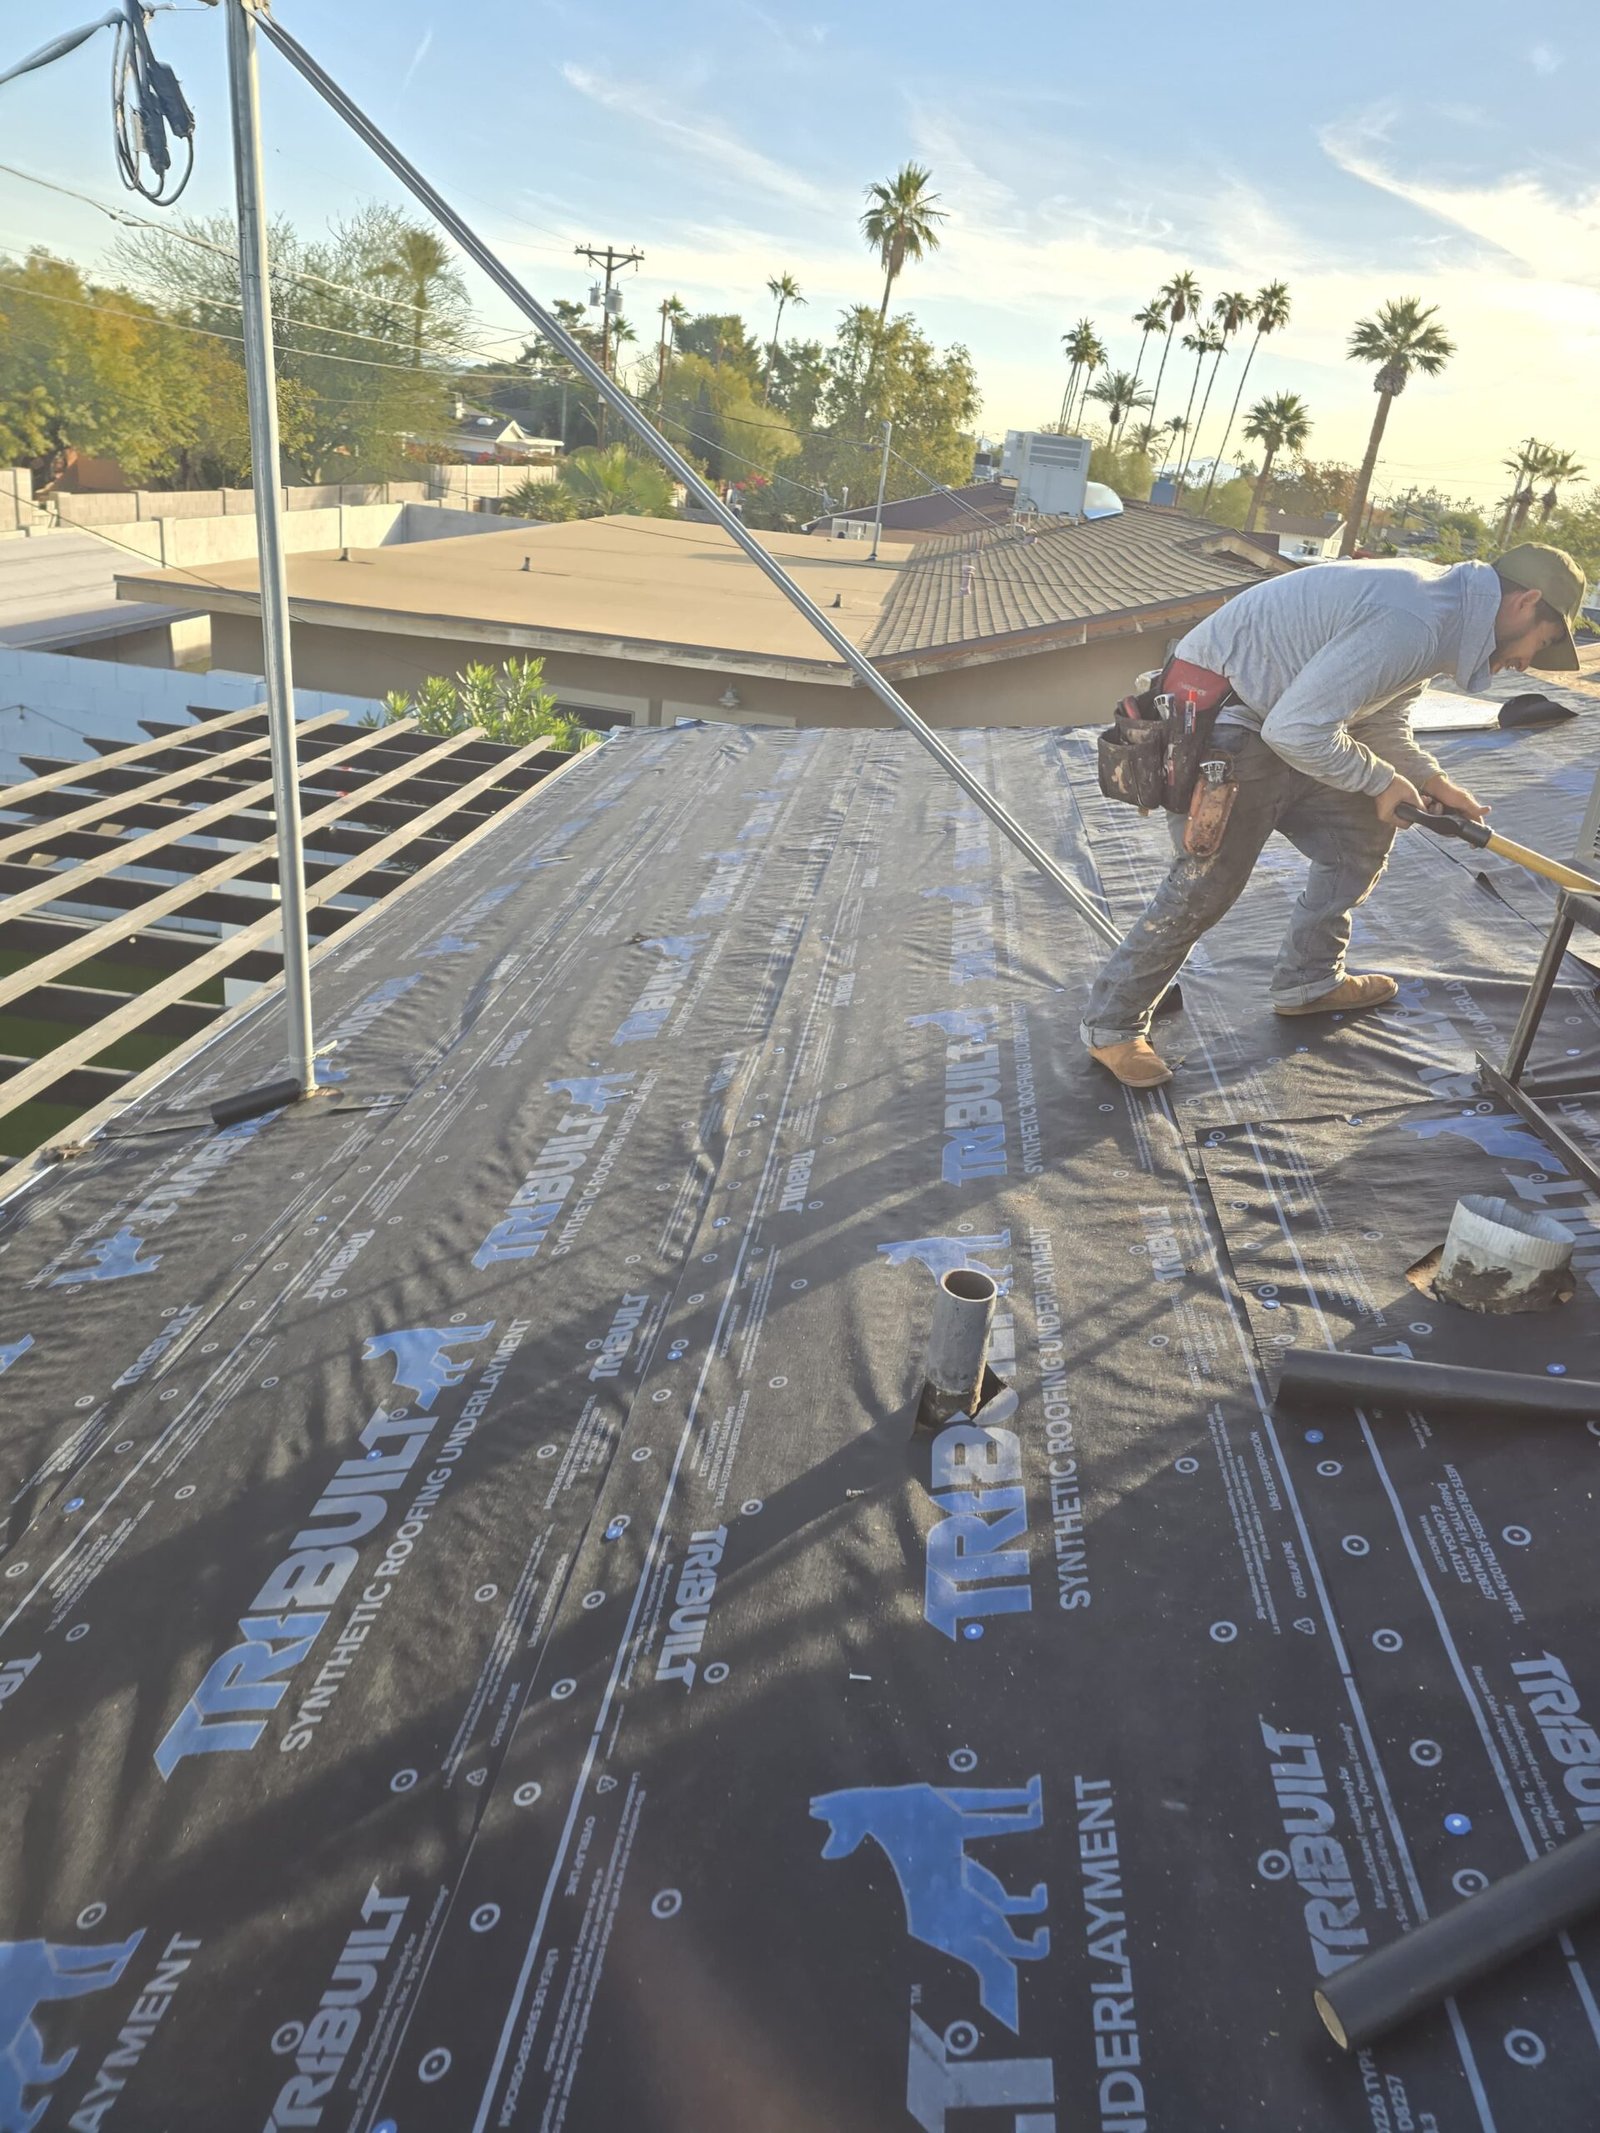
Stage 7: Underlayment Installation
Once the deck is confirmed to be in sound condition, the crew installs the underlayment system. Underlayment is the water-resistant barrier that sits between the decking and the finished roofing material. It is the roof’s secondary line of defense — if the outer roofing material is ever compromised, the underlayment prevents water from reaching the structure.
In Arizona, the requirements for underlayment vary by material type. Tile roofing systems require approved tile underlayments — typically high-temperature modified bitumen products or approved synthetic underlayments — that are rated for the thermal extremes of Arizona’s climate. The quality of the underlayment system is not a place to cut costs. A premium roofing material installed over substandard underlayment will underperform and may void the manufacturer’s warranty.
Stage 8: Flashing Installation and Detailing
Before the primary roofing material is installed, the crew installs or replaces metal flashing at all critical transition points: valleys (where two roof planes meet), around chimneys and skylights, at wall-to-roof intersections, and around all penetrations such as vent pipes and HVAC curbs.
Flashing is one of the most technically demanding elements of a roof replacement. It must be precisely fitted, properly overlapped, and correctly fastened to create watertight seals at the roof’s most vulnerable points. Poor flashing installation is among the most common causes of premature roof leaks — it is worth asking your contractor specifically about their flashing practices.
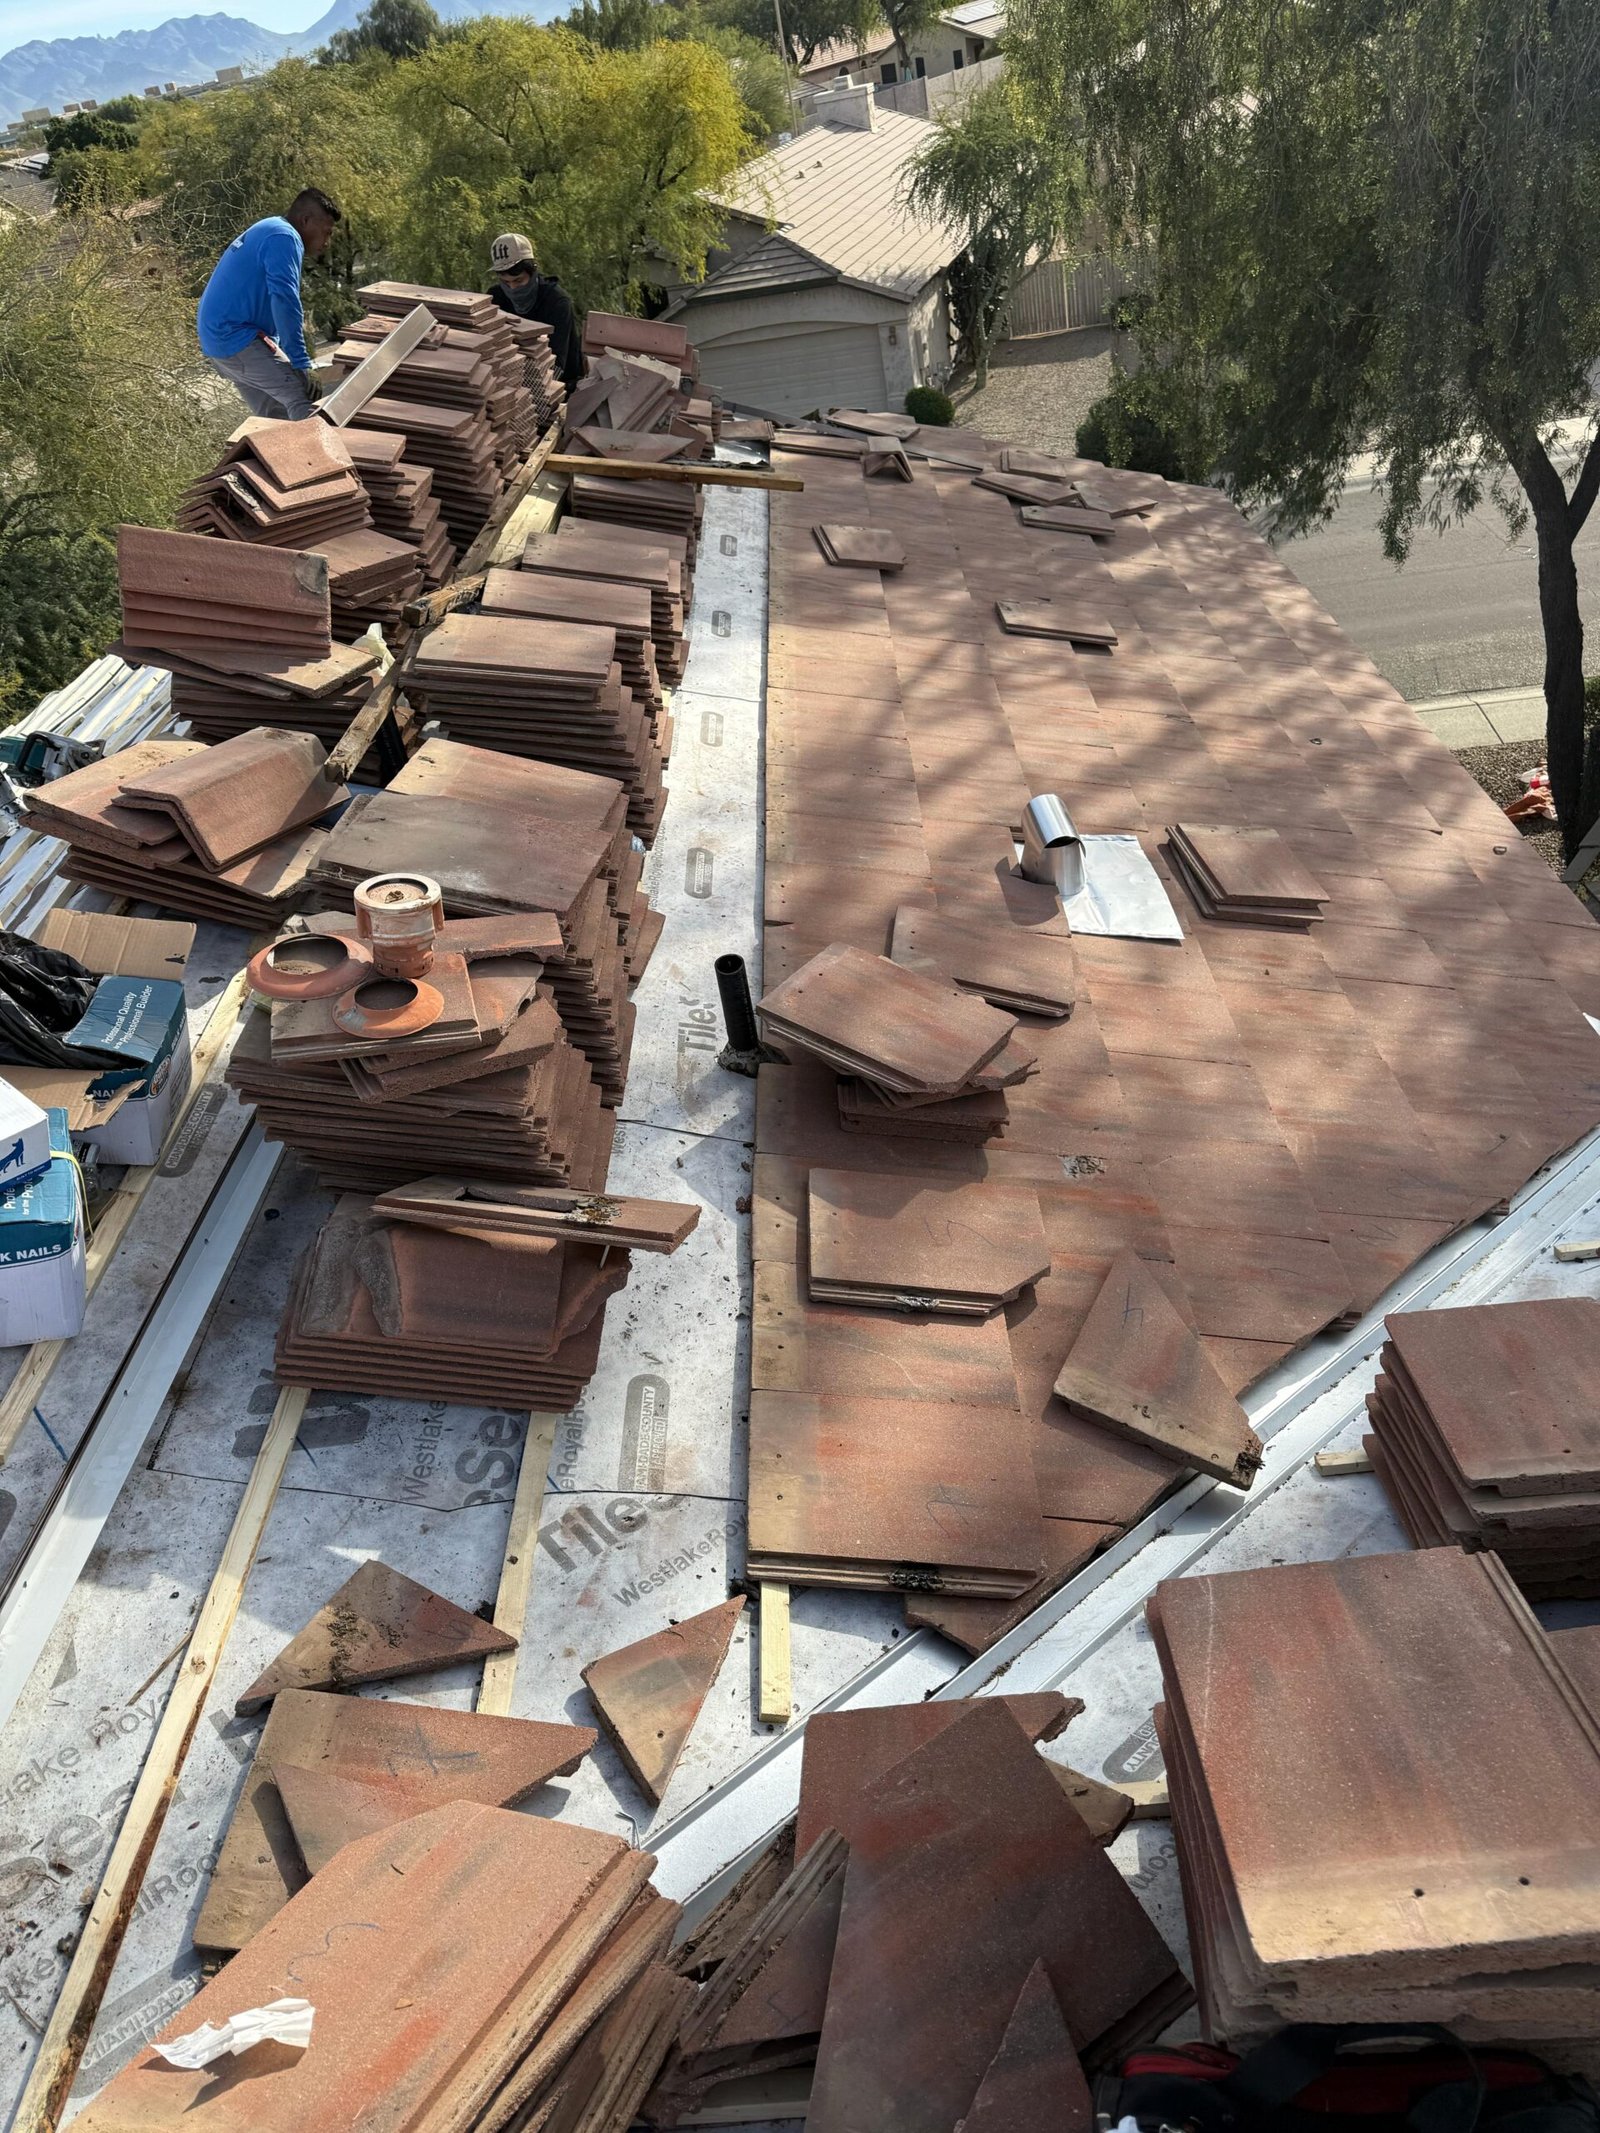
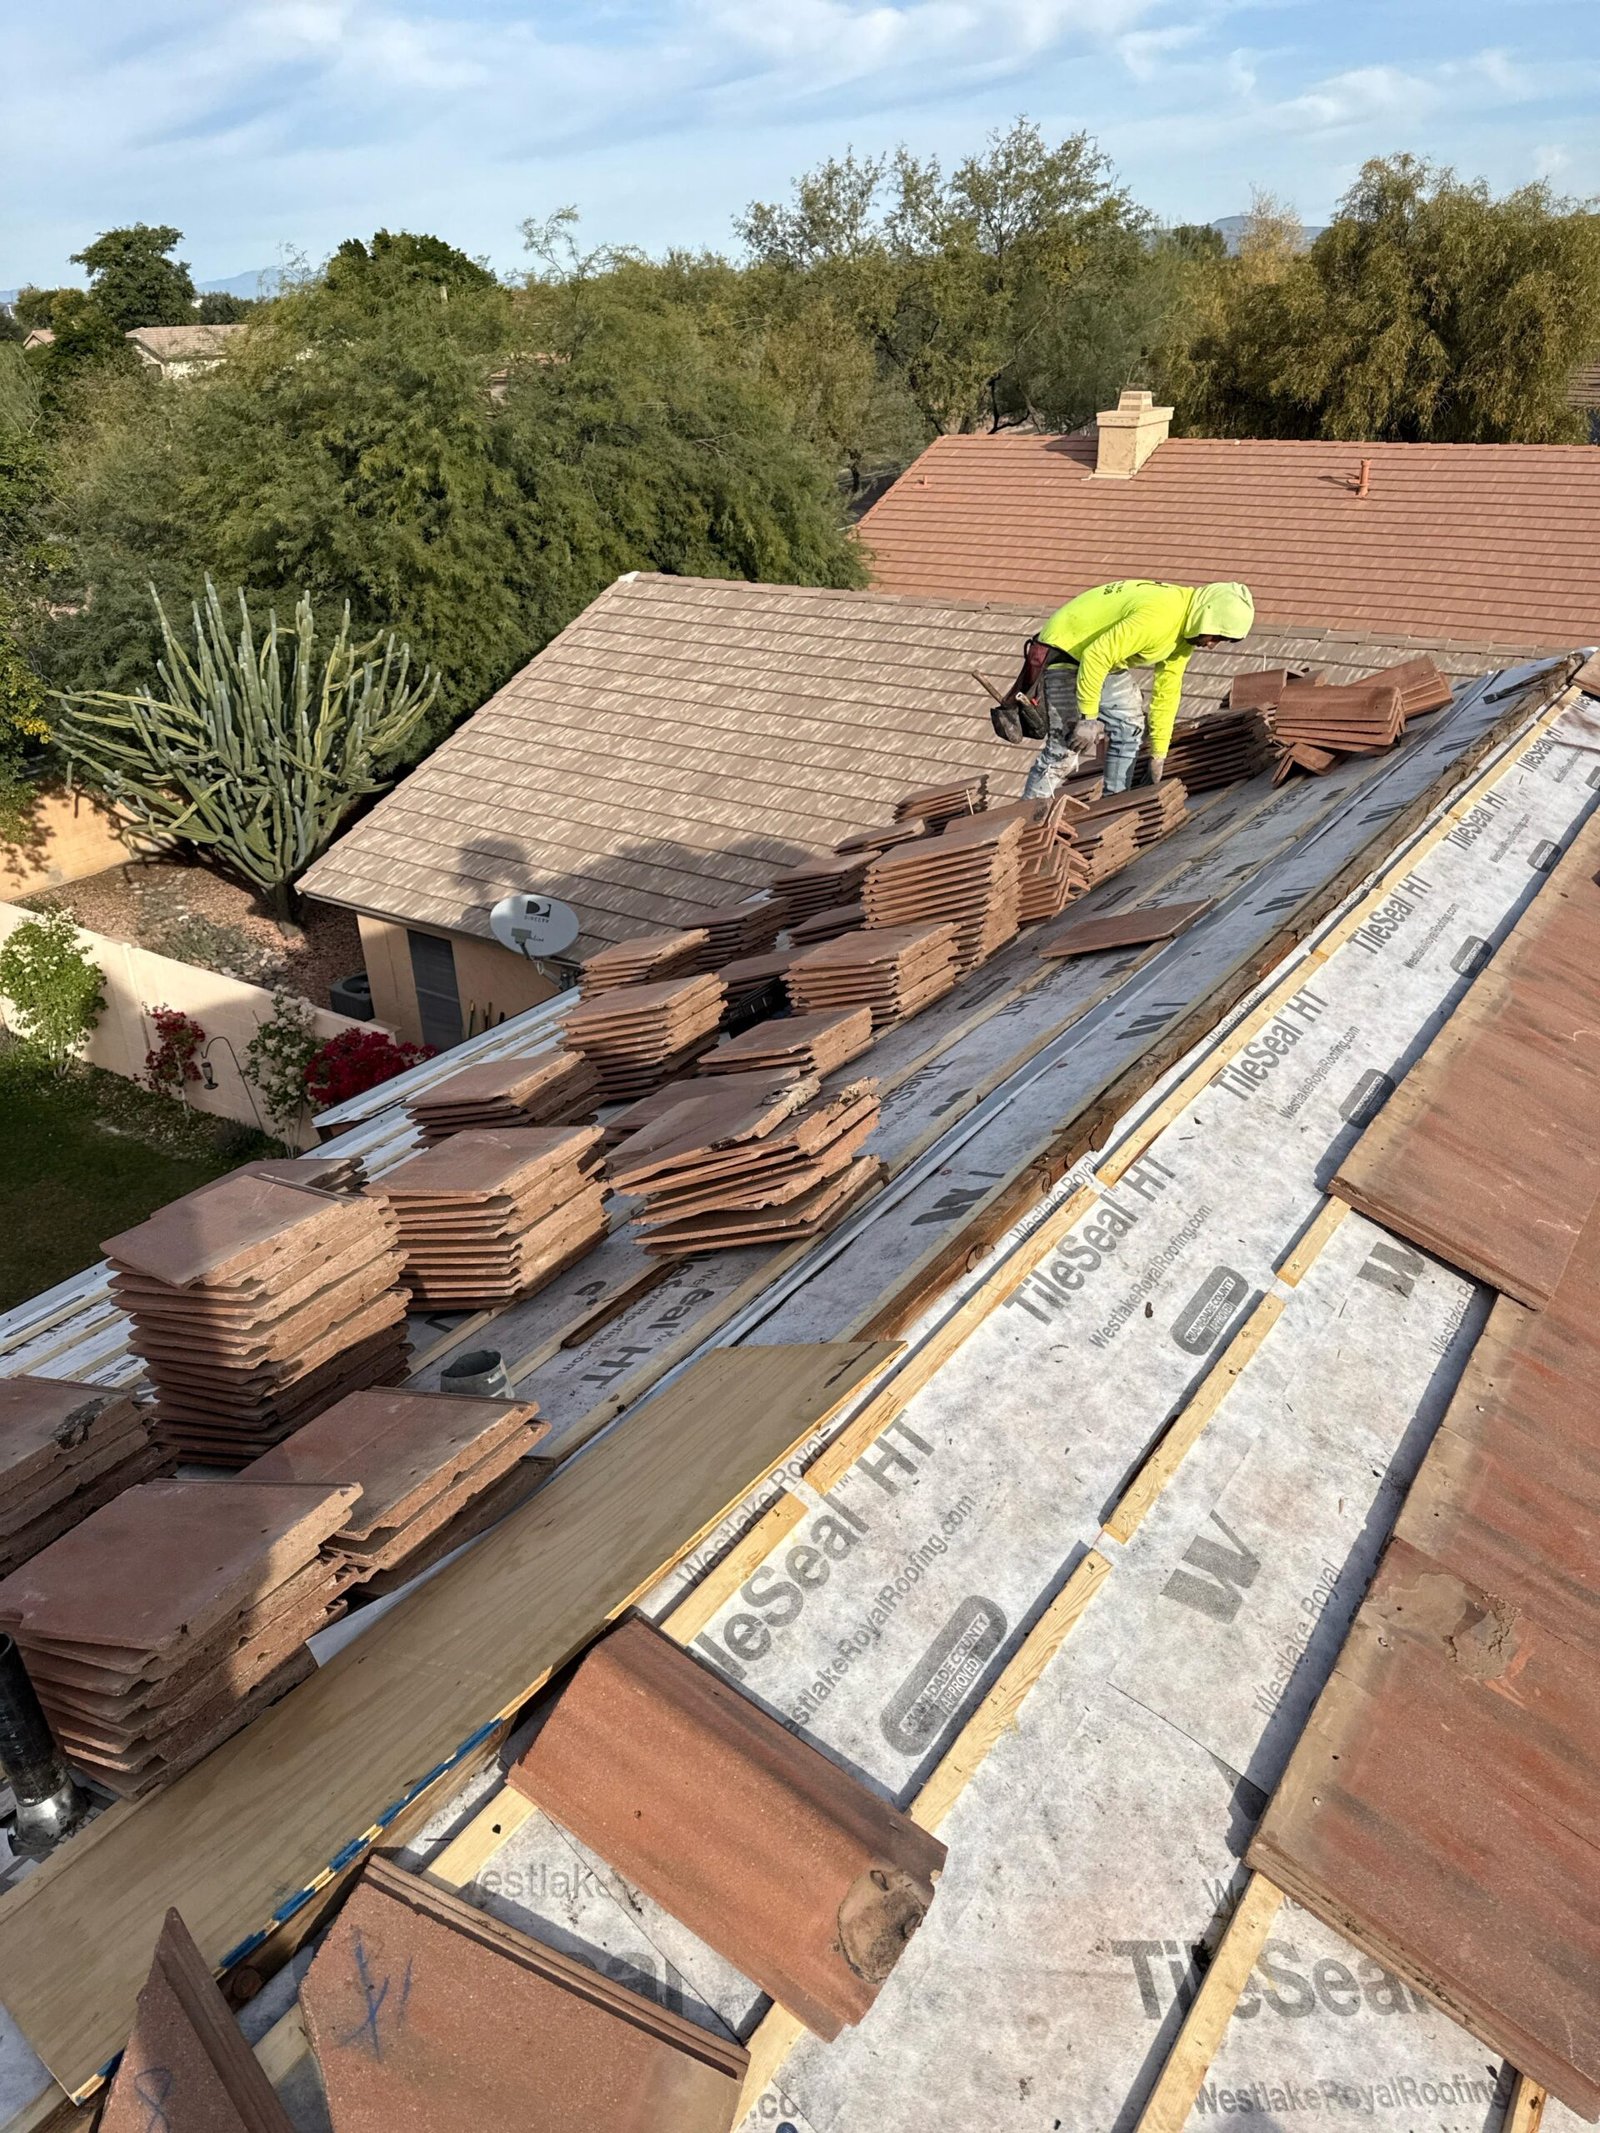
Stage 9: Roofing Material Installation
With underlayment and flashing in place, the crew begins installing the primary roofing material — tile, shingles, or metal panels — working from the lowest point of the roof upward. Each course overlaps the one below it to channel water down and off the roof without infiltration.
For tile roofing, this stage involves setting, aligning, and fastening individual tile pieces in a precise pattern that allows for thermal expansion and drainage. For shingles, courses are laid and fastened with roofing nails at specified intervals. For metal roofing, panels are installed with concealed fasteners that prevent thermal movement from stressing the system.
This stage is where the expertise of the installation crew is most visible. Proper alignment, consistent fastening, and precise cutting around penetrations and at the ridge all determine the long-term performance and appearance of the finished roof.
Stage 10: Ridge Cap and Final Details
Once the primary field of the roof is complete, the crew installs the ridge cap — the material that covers the peak of the roof. For tile roofing, ridge caps are typically rounded or hip tiles set in roofing mortar. For shingles, a purpose-made ridge cap shingle is used. For metal roofing, a custom-formed ridge cap is fabricated to match the panel profile.
At this stage, the contractor also installs or confirms proper installation of all roof vents and ventilation components. Adequate ventilation is critical in Arizona — without it, heat buildup in the attic space accelerates deterioration of the roofing material and increases cooling loads on the structure.
Stage 11: Final Inspection and Cleanup
On completion, a professional contractor conducts a thorough final inspection of the installed system — checking alignment, verifying all flashing seals, confirming ridge cap installation, and looking for any areas that need attention before the crew departs.
The site is then fully cleaned: all debris is removed from the property, a magnetic roller sweeps the yard, driveway, and landscaping for metal fasteners and sharp material, and all protective coverings are removed. A professional contractor leaves the property in clean, undamaged condition.
Your contractor should provide photographic documentation of the completed work and walk you through the finished project before closing out the job.
Stage 12: Warranty Documentation
Before the project is fully closed, ensure you receive all warranty documentation: the manufacturer’s material warranty, the contractor’s labor warranty, and any extended warranty certificates applicable to your installation. Keep these documents in a safe place — they will be valuable if any issues arise in the future and are often required when selling the home.
How Long Does a Roof Replacement Take in Arizona?
For a standard residential roof in the Phoenix Metro, a full replacement typically takes one to three days. Complex homes with multiple roof planes, significant repair requirements, or specialty materials may take three to five days. Weather delays during monsoon season can occasionally extend timelines.
A reputable contractor will provide a realistic timeline estimate before work begins and communicate proactively about any changes.
What to Ask Your Contractor at Each Stage
- Inspection: What did you find, and do you have photos?
- Material selection: What are the warranty terms, and does my installation qualify for the full term?
- Deck inspection: Was there any damage, and can you show me documentation before you proceed?
- Underlayment: What specific product are you using, and is it approved for this material type?
- Flashing: Are you replacing all flashing, or reusing existing flashing?
- Final inspection: Will you walk me through the completed work before I sign off?
Schedule Your Free Inspection in Scottsdale, Phoenix, and the Phoenix Metro
Tip Top Roofing Service serves homeowners across Scottsdale, Phoenix, Tempe, Fountain Hills, Paradise Valley, and the greater Phoenix Metro. We provide free inspections, detailed written estimates, and full transparency at every stage of the replacement process.
Call us at (480) 877-1643 or visit tiptoproofingservice.com to get started.
Tip Top Roofing Service
Licensed & Insured | ROC #355034 | GAF Certified Contractor
6830 E 5th Ave #205, Scottsdale, AZ 85251
(480) 877-1643 | tiptoproofingservice.com